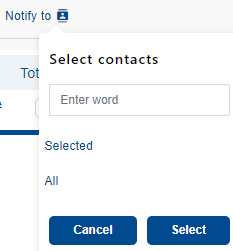
Contacts
The application allows creating and adding contacts to individual sections of an order. This means that if we add contacts in the Customs Clearance section, they will be exclusively stored in the database for this section. The same logic can be applied to the Unloading place or Loading place sections. Additionally, contacts are created separately for each consignee/sender.
In the Header and Containers section, it is not possible to create new contacts under the Notify field. This field contains a list of contacts that are automatically assigned to the logged-in user and their company.
In the Transport Chain section, it is possible to create and select contacts.
Actions
| Icon | The function description |
|---|---|
| Icon for creating a new contact. | |
| Icon to open the contacts directory. |
Contact Creation
To create a new contact, use the icon![]() which will open a popup window where you can fill in the details. Click the Save button to add the contact to the database and immediately select it. To remove a contact from the table, use the action icon
which will open a popup window where you can fill in the details. Click the Save button to add the contact to the database and immediately select it. To remove a contact from the table, use the action icon ![]() .
.
It is necessary to fill in at least the salutation, last name, and one of the three types of contact information (email / phone / mobile). For sending messages from the system, the email field must be filled in. When creating contacts, you can insert a maximum of 6 records into the table at once. After adding the sixth one, the icon ![]() is hidden.
is hidden.
If a user tries to save an empty table, the application will alert them about the mandatory fields.
The last name is automatically converted to uppercase, making it visually distinct from the first name.

Contact Selection
For individual sections, contacts can be filled in/added using the action icon ![]() , which opens a contact search window. Using checkboxes, we select the desired contacts and confirm the selection by clicking the Select button. Contacts can be removed by clicking the cross icon next to the contact's name. Up to 6 contacts can be selected.
, which opens a contact search window. Using checkboxes, we select the desired contacts and confirm the selection by clicking the Select button. Contacts can be removed by clicking the cross icon next to the contact's name. Up to 6 contacts can be selected.
Removing selected contacts
Selected contacts will then be displayed next to the action icon ![]() . Contacts can be removed by clicking the cross icon next to the contact's name.
. Contacts can be removed by clicking the cross icon next to the contact's name.
